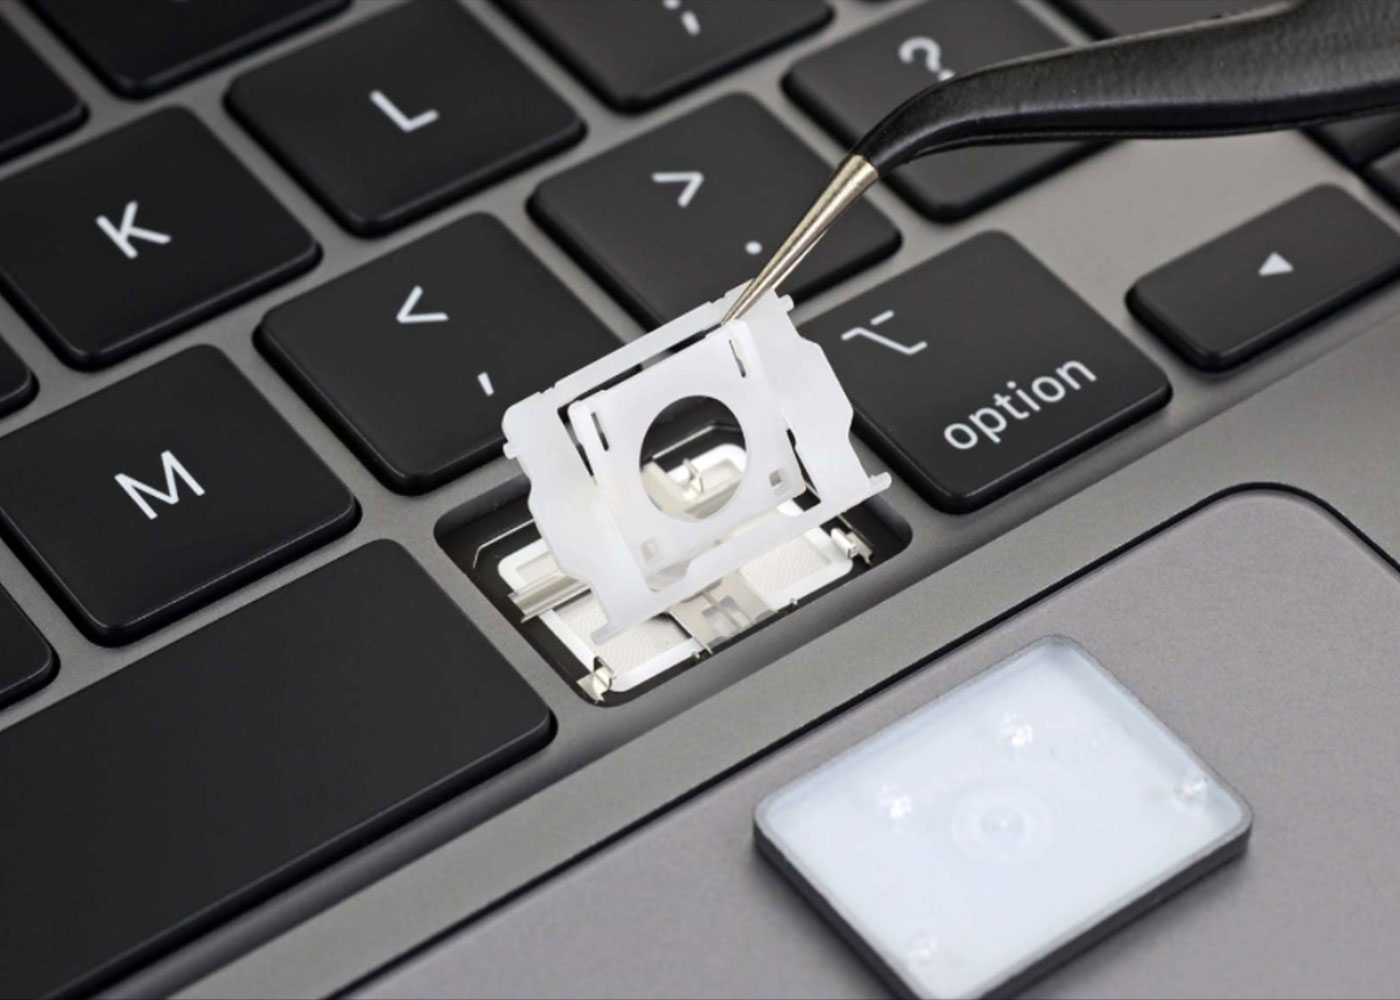
You know how annoying it can be if a key on your computer keyboard ever breaks. Without all the keys functioning properly, typing can be challenging, and it might be challenging to find someone who can fix it for you.
Although replacing broken keys on a computer keyboard may appear difficult, doing so is simple and doesn't require any specialized tools or knowledge. The purpose of this article is to enable you fix a broken key on a laptop or keyboard should you have the need to.
Different Keyboard Types and Repair Techniques
Knowing the type of switch that the keyboard utilizes is one of the most crucial factors to take into account before beginning to diagnose the problem when fixing broken keys on a keyboard. The two most popular switch types used in keyboards are. Membrane and mechanical are these.
Keyboard Membrane vs. Mechanical Switches: What's the Difference?
In keyboards with lower price tags, membrane switches are most frequently employed. They feel softer and quieter than mechanical switches, but they are also less sturdy.
In contrast, mechanical switches are the most traditional switches found on expensive keyboards. They have a reputation for being long-lasting and having precise actuation, but they are also noisier than other kinds of switches.
The methods for replacing broken keys are the same for mechanical and membrane keyboards. However, the difference is that, unlike mechanical keyboards, where you can fix each key separately if the problem with a membrane keyboard is not mechanical (such as a broken keycap), you will need to replace the entire keyboard.
What You™ll Need for Keyboard Key Repair
You must take the broken key out, clean it, and then replace it. The most useful instruments are those listed below:
- A small flathead screwdriver
- Tweezers
- Superglue
- A substitute key

1. How to Repair Broken Keycaps on Keyboard Keys
The most frequent sort of damage is a broken keycap, which is typically easily remedied by just swapping out the damaged part. It's crucial to understand that you must replace the complete keyboard if the key is too deep or the plastic has broken. Below are several suggestions for repairing keyboard keys with cracked keycaps.
How to Take a Keycap Off a Keyboard Switch
Observe the instructions below to properly remove the damaged keycap from the keyboard:
i. Verify to see if the key is indeed broken or only trapped. If the latter, try shifting postures and moving around to see what happens”this might be sufficient for some folks. But if it's broken, go ahead and take it out.
ii. Make use of tweezers and carefully press along the bottom edge of the broken keycap to pry it off.
iii. If you don't have tweezers, you can carefully pull up one side of the keycap with a screwdriver.
iv. The slack side up. Then proceed exactly as you did before, lifting your other hand with caution.
v. You should be able to see some plastic plates after removing the keycaps. If they're being resistant, gently pull on one side while pressing down with the other hand.
I'm done now! The keycap removal procedure for any mechanical keyboard is now clear to you. Remember to check with your manufacturer in advance because most laptops do not feature user-replaceable keycaps.

How to Reinstall a Key on a Keyboard
Let's discuss how to reattach a keycap now that you know how to remove one. It's fairly easy.
i. First, align the switch and keycap. You'll see that the underside of the keycap has a few tiny plastic or metal posts.
ii. The switch's tiny slots can accommodate these posts. Before gently pressing down on the keycap until it snaps into place, check to be that the posts are aligned with the slots.
iii. If you don't have a keycap replacement kit, you can alternatively try to restore a broken key with epoxy or super glue.
iv. Rub the area around the broken key with rubbing alcohol before applying superglue.
v. The new key's plunger should then be coated with a small amount of epoxy or glue and pressed firmly into position. Prior to utilising the keyboard once more, give the epoxy or glue time to dry for 24 hours.
You're all set. Your laptop or desktop's broken keys are no longer a concern.
2. The Best Way to Replace the Whole Keyboard
It can be difficult to replace the entire keyboard because you have to pry open your laptop and remove the screws. Take your time and exercise additional caution.
i. Your keyboard's screws can be removed using a screwdriver, allowing you to remove the keyboard from its case. As you do this, take care not to harm the connectors on the back of the keyboard.
ii. You can start installing the new keyboard after removing the old one.
iii. Next, place your new keyboard's connector in line with the case and press down until they are joined.
iv. When they are in place, firmly press down on the keyboard to make sure it is secure. Insert all of the screws that you previously removed after that.
Before putting your computer away after replacing your keyboard, make sure to test it out. Verify that all of the locks are secure and that no screws are loose. Once you're happy, you can reassemble your computer and use your new keyboard.

3. How to Repair Laptop Keys That Are Not Working Due to Dirt:
You should take the following actions if accumulated dust, filth, and other debris is the reason of the keys not functioning:
i. Start by using a soft cloth to gently clean them.
ii. If this doesn't work, you can try blasting any accumulation of dust and debris away with compressed air.
iii. Holding the can upside down runs the risk of damaging the keys, so be sure to hold it upright.
As you can see, since you don't need to pry open your keyboard or replace the keycaps, fixing broken keys caused by dust collection is much simpler.
4. How to Repair Liquid Spill Damaged Keyboard Keys:
Spills of liquid can cause the keyboard's keys to malfunction either temporarily or permanently. You can use the procedures below to repair laptop keys damaged by liquid spills:
i. The laptop must first be turned off and disconnected from all power sources.
ii. The battery and any other replaceable parts should then be removed.
iii. Next, wipe any wetness from the keyboard using a dry cloth.
iv. If any keys are stuck, you can carefully pry them up once the keyboard has dried and clean the area beneath them with a cotton swab dipped in rubbing alcohol.
v. Reassemble the laptop and check the keys for functionality before putting it all back together.
However, you will need to replace the entire membrane keyboard if the liquid falls on any of the keys. However, if the keyboard is mechanical, you can swap out the individual keys by using the earlier-discussed procedure. Therefore, it's crucial to exercise caution whenever liquids are close to your keyboard.
Easily Repair Your Broken Keyboard
The broken keys on a laptop or desktop keyboard can be fixed in a variety of methods, as you can see. However, depending on how it was damaged in the first place, the measures you must take may change. You only need to clear it up or use compressed air if it is dust buildup.
However, if the damage is more severe, you'll require the appropriate replacement item to finish the task, whether it's a broken keycap or a harmed PCB. Remember that if the problem is widespread and your keyboard isn't functioning at all, it might be a software-related problem or, worse, the result of a bad motherboard.
Remember to exercise caution and be gentle when attempting to fix your keyboard. If you are unsure or uncomfortable with any step, it's best to consult a professional for assistance to avoid causing further damage.
If you wish to contribute to our blog, please email us on morhadotsan@gmail.com.


